


A sales screenshot should answer a buyer’s question without making them hunt for the answer. A dashboard full of tiny numbers might show how much your product does, but it can leave prospects unsure which part matters to them.
Preparing screenshots means choosing a useful moment, removing distractions, and making the result easy to understand wherever someone sees it.
Follow the steps below to turn everyday product captures into clear sales assets that reps can confidently use in emails, presentations, and follow-ups.
Match the Screenshots to Buyer Questions
Start with the question a prospect needs answered, not the screen your team likes most. An operations manager asking about overdue work needs a different view than an executive evaluating reporting.
Write one sentence describing what the buyer should learn. “See which approvals are blocking payment” gives the team a clearer target than “show the finance dashboard,” and it makes choosing what to capture much easier.
Standardize the Files Your Sales Team Shares
Decide where each screenshot will appear before choosing its export settings. An image destined for a presentation may need an alternative format and different dimensions than one placed inside a narrow email.
When your delivery workflow calls for a standardized JPG, Canva’s free converter can turn your captures into share-ready JPG images. And it only takes a few clicks.
Keep the original capture too. And inspect the converted version to ensure that small labels and interface details remain readable.
Record three basics in your export checklist:
- Intended placement
- Required dimensions
- Approved file format
Avoid treating JPG as the default for every situation. Compare the exported image with the original, especially around small text, and retain a PNG version when it preserves interface details more clearly.
Build a Safe and Believable Demo Environment:
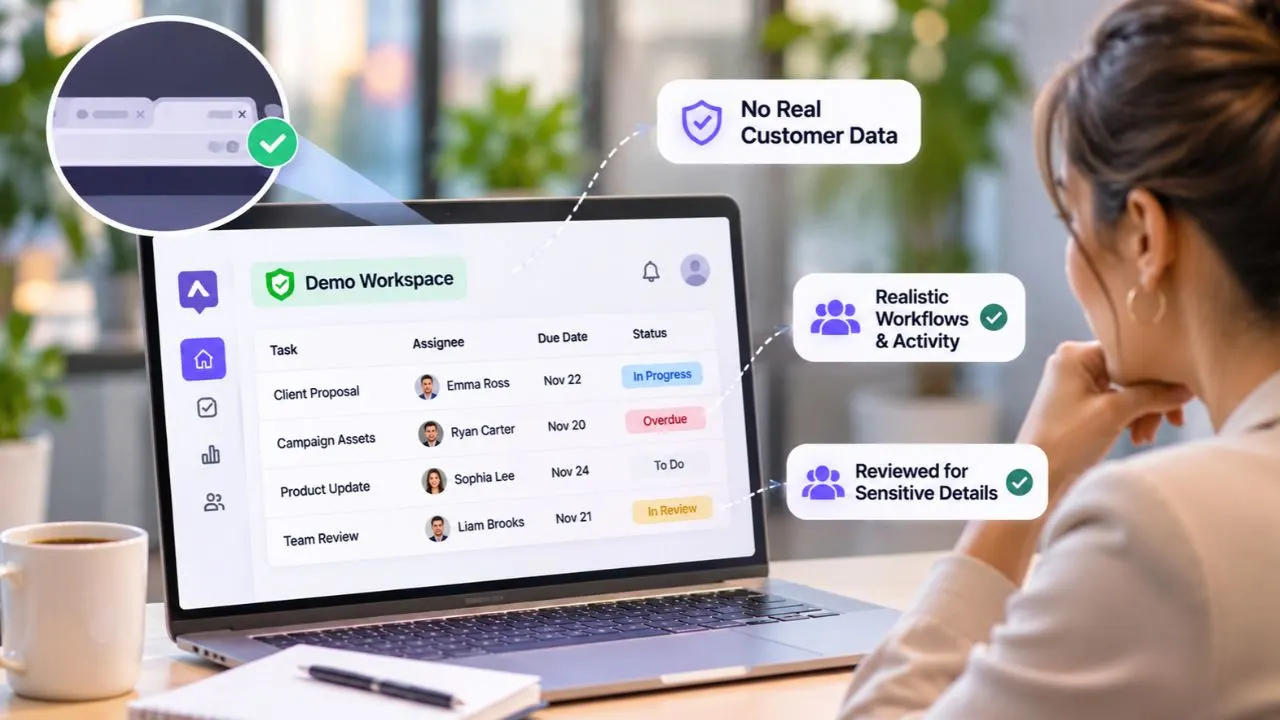
Prepare a dedicated demo workspace before capturing anything. Populate it with fictional names, realistic activity, and examples that reflect the buyer’s workflow without exposing real customer information.
Check more than the center of the screen. Browser tabs, account menus, notifications, avatars, and sidebar labels can reveal information that your team never intended to share.
Use believable data rather than exaggerated results. A task list with varied deadlines and a few unresolved items can explain a workflow more honestly than a dashboard where every metric looks perfect.
Ask someone outside the capture process to review the workspace for sensitive details. Removing private information before capture is a safer routine than relying entirely on edits afterward.
Capture the Workflow and Remove Distractions
Capture the SaaS product at a size that keeps its interface clear in the intended placement. Close unrelated panels, dismiss temporary notifications, and move the pointer away from the feature you want buyers to notice.
According to guidance from Nielsen Norman Group, SaaS visuals should show clear product screenshots rather than rely on generic imagery. Apply that principle by showing the actual workflow your prospect is evaluating.
Crop around the relevant action while preserving enough navigation to explain where it happens. A tightly cropped approval button means little if viewers cannot tell what they are approving.
For a sequence, keep the window size and framing consistent across captures. Consistent framing helps buyers follow the workflow rather than reorient themselves with every image.
Add Context Without Covering the Product
Give each screenshot a short caption that explains what the buyer should notice. Describe the useful action or outcome rather than repeating a menu label already visible in the image.
“Review overdue approvals before the payment run” provides more context than “Approvals screen.” Keep the wording specific enough that someone forwarding the slide does not need to write a separate explanation.
Use arrows, outlines, or numbered markers only when they remove genuine ambiguity. Keep annotations away from controls and text, and use the same visual treatment throughout the set.
Never add labels that imply the product performs an action it cannot actually complete. Distinguish illustrative annotations from interface elements so prospects do not mistake commentary for functionality.
Test Each Screenshot Where Buyers Will See It
Place the screenshot inside its actual email, slide, or document before approving it. A capture that looks sharp on a large monitor may become difficult to read once it sits beside a presentation copy.
Review the asset at its expected viewing size rather than zooming in until it looks acceptable. Check whether the key label, relevant value, and next action remain easy to identify.
Ask a teammate unfamiliar with the workflow to explain what the image shows. Their answer can reveal missing context that the capture team no longer notices.
If they need a lengthy explanation, simplify the image or split the workflow into separate captures. Adding more arrows rarely solves a screenshot that tries to explain too much.
Organize Approved Assets and Assign an Owner
Store approved screenshots somewhere salespeople can find them without searching old conversations. Separate current assets from drafts and retired versions so an outdated interface does not accidentally enter a proposal.
Use filenames that identify the feature, audience, and capture date. Add a short description explaining the buyer question each image answers and any limitations on where it should be used.
Assign an owner who can check screenshots after interface changes or messaging updates. Review captions alongside the images, since an accurate capture can still become misleading when paired with outdated wording.
Keep a simple replacement process so reps know which version to use. When an asset changes, update its shared location and remove obsolete copies from reusable sales templates.
Making Every Screenshot Ready for a Buyer Conversation
Useful screenshots for sales combine a clear buyer question, safe demo data, readable framing, and enough context to stand alone. Consistent exports and a maintained library make that preparation easier to repeat.
Start with one frequently used screenshot and run it through the full process before refreshing the rest. A focused review gives your team a practical standard it can apply across future assets.
Hopefully this post has been helpful! If so, take a moment to explore some of our other informative and interesting articles.